
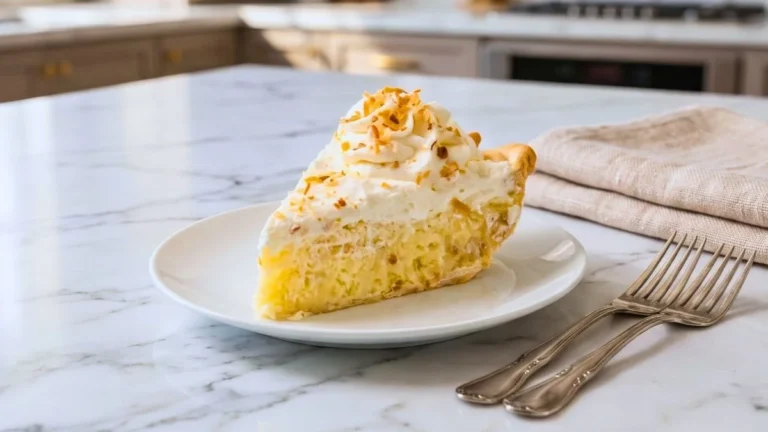

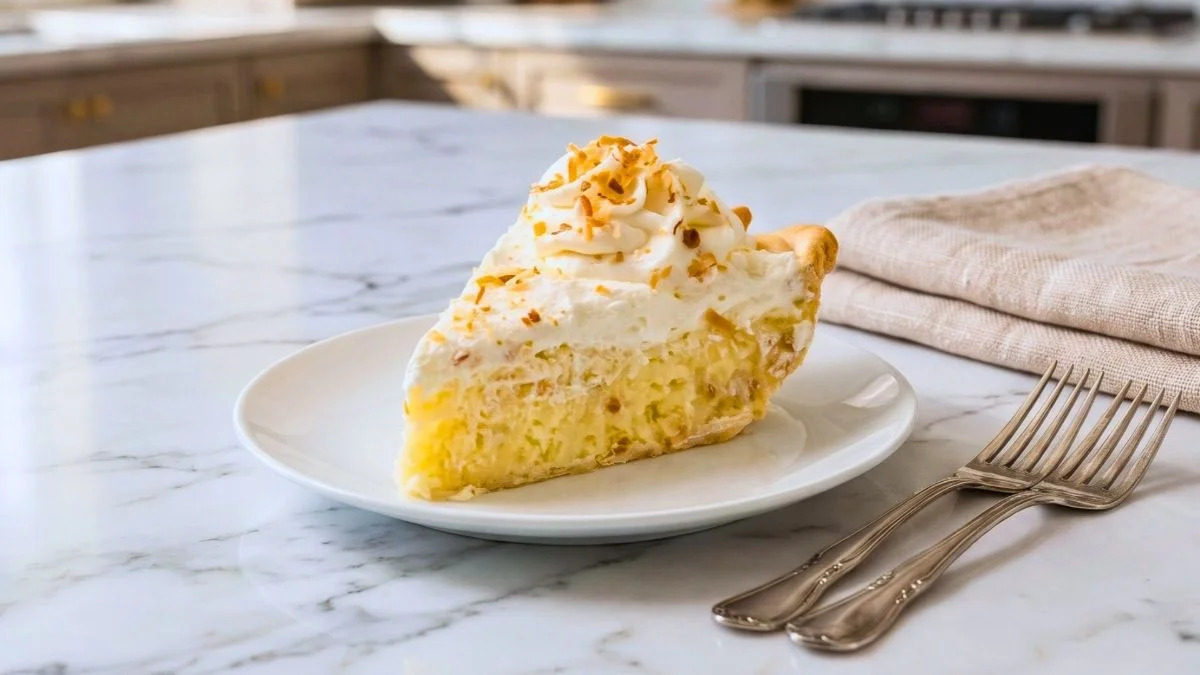
A slice of homemade Barefoot Contessa Coconut Cream Pie brings together everything I love about an old-fashioned dessert: a crisp pie crust, silky coconut custard, fluffy whipped cream, and a generous sprinkle of toasted coconut. Every bite is creamy, sweet, and full of comforting coconut flavor, making it a lovely treat for family gatherings, holidays, or a relaxed weekend dessert.
What makes this coconut cream pie especially enjoyable is the balance of textures. The rich coconut milk custard feels smooth and velvety, while shredded coconut adds a little chewiness. A cloud of freshly whipped cream on top keeps each slice light, and the toasted coconut gives it a delicious finishing touch.
Although this recipe takes a little patience while the filling chills, the preparation is straightforward and uses simple ingredients. Make it the night before, let the custard set in the refrigerator, and you’ll have a beautiful homemade dessert ready to serve the next day.
What Is Barefoot Contessa Coconut Cream Pie?
Barefoot Contessa Coconut Cream Pie is a homemade-style coconut dessert inspired by the classic recipes associated with Ina Garten’s Barefoot Contessa cooking. It features a baked pie crust filled with rich coconut custard, topped with freshly whipped cream and toasted shredded coconut.
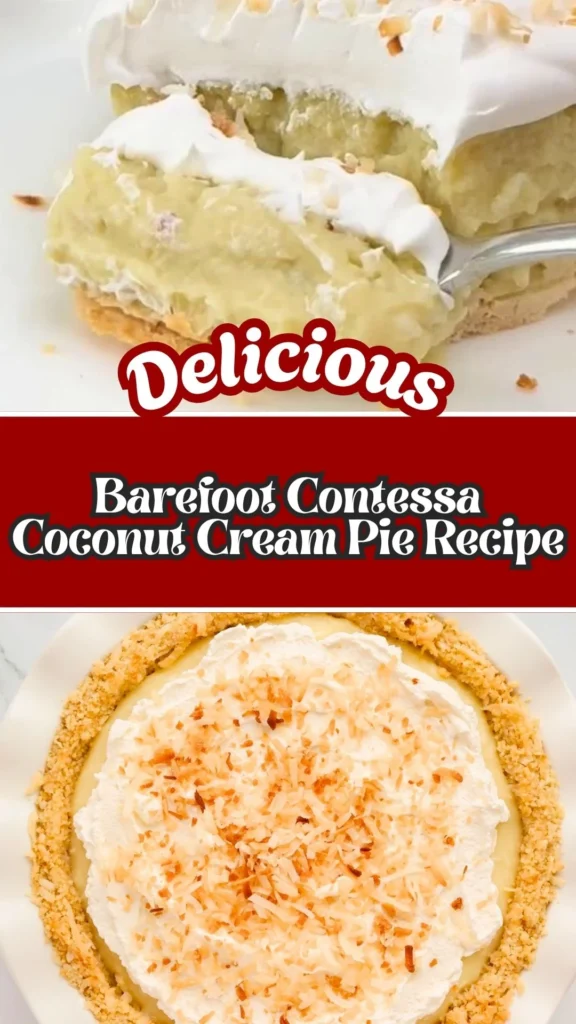
This version uses full-fat coconut milk, whole milk, egg yolks, sugar, and cornstarch to create a thick, smooth filling. Vanilla and a touch of coconut extract bring out the flavor, while shredded coconut gives the custard its signature texture. Once chilled, the filling becomes firm enough to slice neatly without losing its creamy consistency.
Why You’ll Love This Barefoot Contessa Coconut Cream Pie Recipe
-
Rich coconut flavor: Full-fat coconut milk and shredded coconut give every bite a lovely tropical taste.
-
Creamy homemade filling: Egg yolks and cornstarch create a smooth, thick custard without complicated techniques.
-
Beautiful topping: Freshly whipped cream and toasted coconut make the pie look bakery-worthy.
-
Make-ahead friendly: The filling needs time to chill, so you can prepare the pie a day before serving.
-
Simple ingredients: Most ingredients are easy to find at a regular grocery store.
-
Perfect for gatherings: This pie makes a lovely dessert for holidays, birthdays, potlucks, and family dinners.
Ingredients for Barefoot Contessa Coconut Cream Pie
This coconut cream pie uses simple ingredients to create a rich, smooth filling and a light whipped topping. Here is what you’ll need.
For the coconut cream pie filling
-
1 (9-inch) baked and cooled pie crust: Use a homemade or store-bought pie crust. A graham cracker crust also works beautifully and adds a slightly sweet, crunchy base.
-
1 can (13.5 oz) full-fat coconut milk: This is the main source of coconut flavor and gives the custard a rich, creamy texture. Shake the can well before opening.
-
1 cup whole milk: Helps balance the richness of the coconut milk and creates a smooth custard.
-
5 large egg yolks: These add richness and help the filling develop a thick, creamy consistency.
-
¾ cup granulated sugar: Sweetens the custard without overpowering the coconut flavor.
-
¼ cup cornstarch: Thickens the filling so the pie holds its shape when sliced.
-
¼ teaspoon salt: Balances the sweetness and brings out the coconut flavor.
-
2 tablespoons unsalted butter: Adds a silky finish and makes the custard taste richer.
-
1 teaspoon vanilla extract: Gives the filling a warm, sweet aroma.
-
⅛ teaspoon coconut extract (optional): Adds an extra boost of coconut flavor. A little goes a long way.
-
1 cup sweetened shredded coconut: Adds texture and gives the filling its classic coconut cream pie character.
For the whipped cream topping
-
1 cup cold heavy whipping cream: Creates a soft, fluffy topping that pairs perfectly with the rich coconut filling.
-
2 tablespoons powdered sugar: Sweetens the whipped cream and helps it taste balanced.
-
¼ cup shredded coconut, lightly toasted: Sprinkled over the whipped cream for a crunchy texture and beautiful golden finish.
Kitchen Utensils and Equipment
Gather these kitchen tools before you begin making your coconut cream pie:
-
Large saucepan: For heating the milk and cooking the coconut custard.
-
Large mixing bowl: For preparing the egg yolk and sugar mixture.
-
Whisk: Helps combine the ingredients smoothly and prevents lumps.
-
Measuring cups and spoons: For accurate ingredient measurements.
-
Fine-mesh sieve (optional): Removes any small lumps from the finished custard.
-
Rubber spatula: Makes it easier to scrape the custard from the saucepan.
-
9-inch pie dish: Holds the prepared crust and coconut filling.
-
Plastic wrap: Covers the custard while it chills.
-
Electric hand mixer or stand mixer: For whipping the cream until fluffy.
-
Mixing bowl: For preparing the whipped cream topping.
-
Oven or skillet: For lightly toasting the shredded coconut garnish.
-
Sharp knife: For cutting clean slices when serving.
Prep Time, Cook Time, Total Time, and Servings
Cook Time: 15 minutes
Chilling Time: 8 hours or overnight
Total Time: About 8 hours 40 minutes
Servings: 8 slices
These are estimated times and may vary depending on how quickly your custard cools and how long your pie needs to set.
How to Make Barefoot Contessa Coconut Cream Pie
Making this coconut cream pie is easier than it looks. The main trick is cooking the custard slowly and giving it enough time to chill before adding the whipped cream. Follow these steps for a smooth, creamy filling and beautiful slices.
Step 1: Heat the Milk
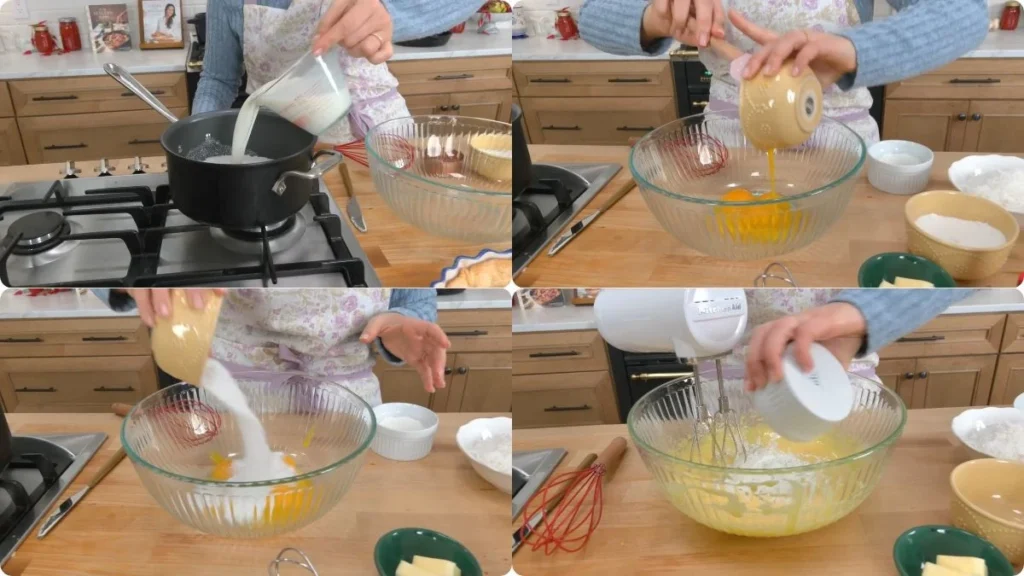
Pour the coconut milk and whole milk into a large saucepan. Place it over medium heat and warm the mixture until it just begins to simmer around the edges.
Stir occasionally to keep the milk from sticking to the bottom. Avoid bringing it to a full boil, as you only need it hot enough to temper the egg mixture.
Step 2: Prepare the Egg Mixture
In a large mixing bowl, whisk the egg yolks and granulated sugar until the mixture looks pale and slightly fluffy.
Add the cornstarch and salt. Continue whisking until everything is smooth and no dry cornstarch remains. This mixture will help create a thick, creamy coconut custard.
Step 3: Temper the Eggs
Slowly pour about half of the hot milk mixture into the egg yolk mixture while whisking continuously.
Take your time with this step. Adding the hot milk gradually raises the temperature of the eggs without scrambling them.
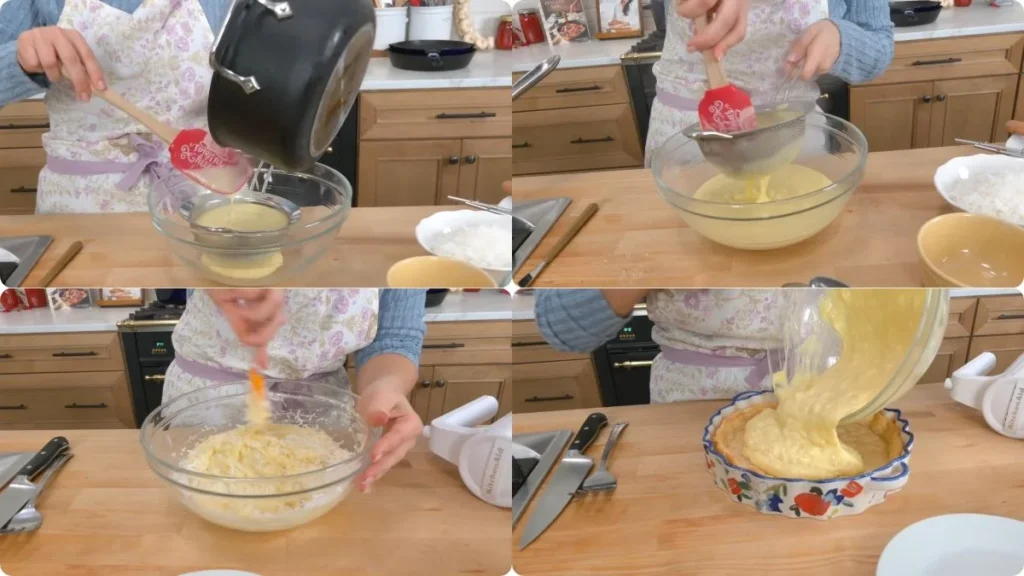
Once combined, slowly pour the tempered egg mixture back into the saucepan with the remaining milk. Keep whisking as you pour.
Step 4: Cook the Coconut Custard
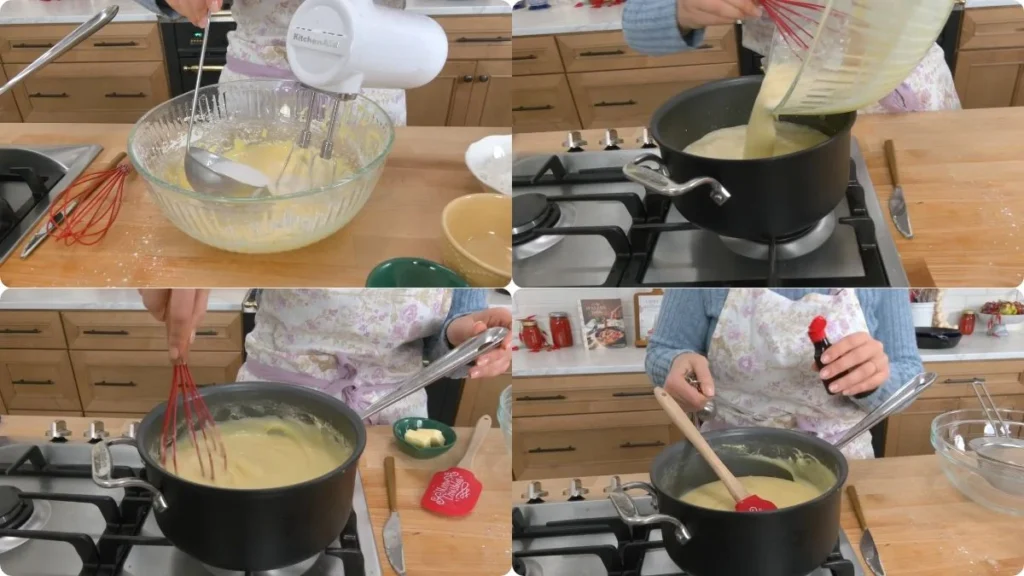
Reduce the heat to low and cook the mixture for about 5–6 minutes, whisking continuously.
As the custard cooks, it will gradually become thicker, smoother, and glossy. Once it reaches a pudding-like consistency, remove the saucepan from the heat.
Whisk in the unsalted butter, vanilla extract, and optional coconut extract until fully melted and combined.
For an extra-smooth filling, pour the custard through a fine-mesh sieve to remove any small lumps.
Step 5: Add the Coconut and Fill the Pie Crust
Allow the custard to cool for about 30 minutes, until it is warm but no longer piping hot.
Stir in the sweetened shredded coconut until evenly distributed. Pour the filling into your prepared and cooled 9-inch pie crust, spreading it evenly with a spatula.
Press a piece of plastic wrap directly against the surface of the custard. This prevents a skin from forming while the pie chills.
Place the pie in the refrigerator overnight, or for at least 8 hours, until the filling is completely set.
Step 6: Make the Whipped Cream
Just before serving, pour the cold heavy whipping cream into a chilled mixing bowl. Add the powdered sugar.
Using an electric mixer, beat on medium-high speed until stiff peaks form. The whipped cream should hold its shape when you lift the beaters.
Be careful not to overbeat, as the cream can become grainy and start turning into butter.
Step 7: Garnish and Serve
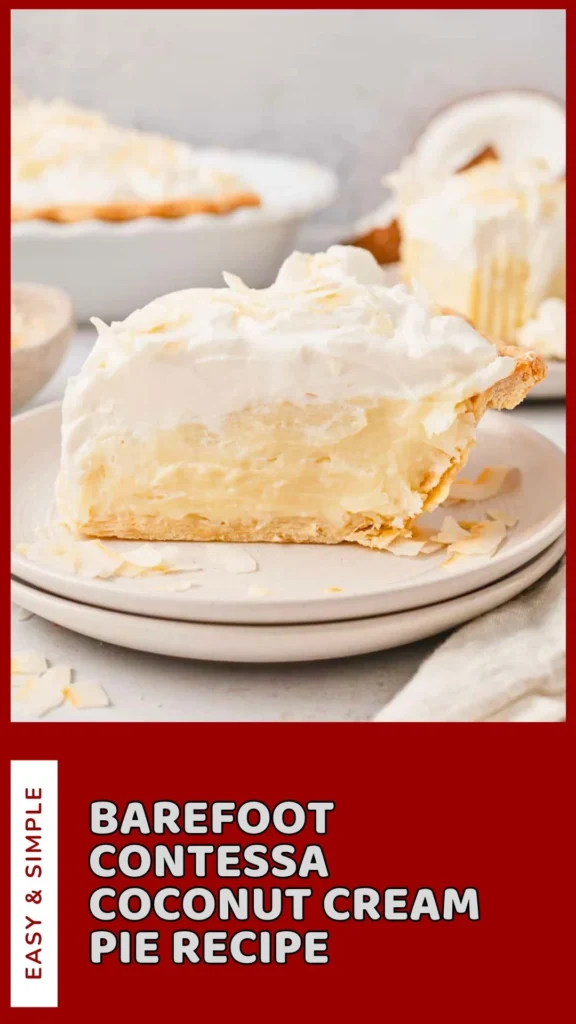
Spread the whipped cream evenly over the chilled coconut filling, or transfer it to a piping bag and pipe decorative swirls around the top.
Sprinkle the lightly toasted shredded coconut over the whipped cream for a little crunch and extra coconut flavor.
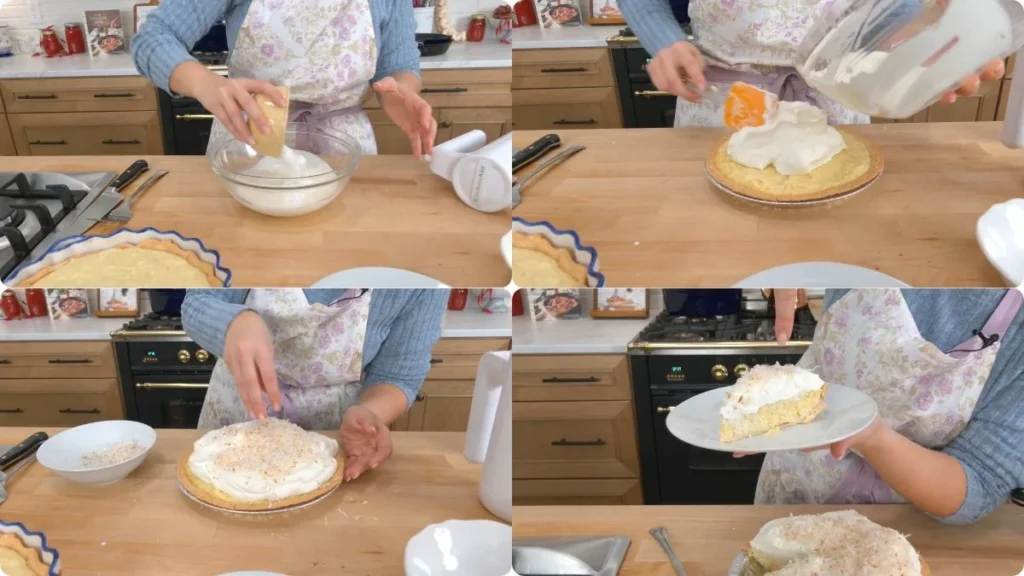
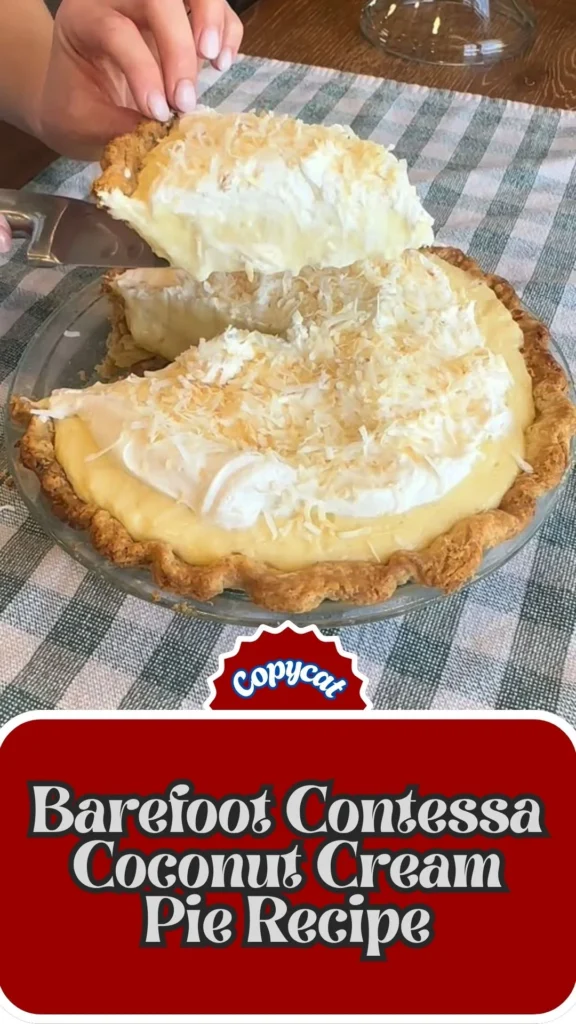
Slice with a sharp knife, wiping the blade between cuts for cleaner slices. Serve chilled and enjoy!
Tips, Tricks, and Substitutions for the Best Coconut Cream Pie
A few simple techniques can make a big difference in the flavor and texture of your homemade coconut cream pie.
-
Use full-fat coconut milk: It gives the filling a richer coconut flavor and creamier texture. Avoid using light coconut milk if possible.
-
Whisk continuously: Keep whisking while cooking the custard to prevent lumps and stop it from sticking to the bottom of the saucepan.
-
Temper the eggs slowly: Add the hot milk gradually while whisking. Pouring it too quickly can scramble the egg yolks.
-
Don’t skip chilling: The pie needs enough time in the refrigerator to become firm. Overnight chilling gives the best slicing results.
-
Use cold cream: Heavy cream whips more easily when it is cold. You can also chill your mixing bowl and beaters beforehand.
-
Toast the coconut carefully: Use a dry skillet over low heat or an oven, stirring frequently. Coconut can burn quickly, so keep an eye on it.
-
Make it extra coconutty: Add the optional coconut extract if you enjoy a stronger coconut flavor.
-
Try a graham cracker crust: A graham cracker crust adds a sweet, buttery crunch that pairs wonderfully with the creamy filling.
Easy Ingredient Substitutions
-
Whole milk: You can use 2% milk, although the filling may be slightly less rich.
-
Sweetened shredded coconut: Unsweetened shredded coconut works too, but the filling will have a less sweet coconut flavor.
-
Vanilla extract: Pure vanilla extract is ideal, but imitation vanilla can work in a pinch.
-
Pie crust: Use a traditional baked pastry crust or a prepared graham cracker crust.
-
Heavy whipping cream: For a dairy-free topping, use a suitable coconut-based whipping cream, following its package instructions.
What Is the Difference Between Coconut Cream Pie and Coconut Custard Pie?
Coconut cream pie and coconut custard pie both have a rich coconut flavor, but their preparation and texture are slightly different.
Coconut cream pie is usually made by cooking a thick coconut custard on the stovetop, pouring it into a baked pie crust, and chilling it until firm. It is commonly finished with a generous layer of whipped cream and toasted coconut.
Coconut custard pie, on the other hand, generally has a filling made from eggs, milk or cream, sugar, and coconut that is baked directly in the pie crust. Its texture is more delicate and set, similar to a traditional baked egg custard.
The biggest difference is that coconut cream pie has a cooked, chilled filling with a fluffy whipped cream topping, while coconut custard pie is baked as one complete dessert.
What to Serve with Barefoot Contessa Coconut Cream Pie
This coconut cream pie is delicious on its own, but a few simple accompaniments can make dessert feel even more special.
-
Fresh berries: Strawberries, raspberries, and blueberries add a refreshing contrast to the rich coconut filling.
-
Fresh pineapple: Small pieces of pineapple bring a sweet, tropical flavor that works beautifully with coconut.
-
Hot coffee: A cup of freshly brewed coffee balances the sweetness of the pie.
-
Black tea: Serve it with a warm cup of tea for a simple afternoon dessert.
-
Vanilla ice cream: A small scoop alongside a slice makes an extra-indulgent treat.
-
Chocolate shavings: Sprinkle a few dark chocolate curls over the whipped cream for a delicious coconut-and-chocolate combination.
Storage and Reheating Instructions
How to Store Coconut Cream Pie
Cover the leftover pie loosely with plastic wrap or place it in an airtight pie container. Keep it in the refrigerator for up to 3 days. For the best texture, add the whipped cream topping shortly before serving.
Can You Freeze Coconut Cream Pie?
Freezing is not recommended because the custard and whipped cream can become watery or grainy after thawing. This pie tastes best when freshly prepared and chilled in the refrigerator.
How to Serve Leftover Coconut Cream Pie
Coconut cream pie is best served cold, straight from the refrigerator. You don’t need to reheat it. Use a sharp knife to cut each slice and enjoy it chilled.
Barefoot Contessa Coconut Cream Pie Recipe
Ingredients
Method
- Pour the coconut milk and whole milk into a large saucepan. Place it over medium heat and warm the mixture until it just begins to simmer around the edges. Stir occasionally to keep the milk from sticking to the bottom. Avoid bringing it to a full boil, as you only need it hot enough to temper the egg mixture.
- In a large mixing bowl, whisk the egg yolks and granulated sugar until the mixture looks pale and slightly fluffy. Add the cornstarch and salt. Continue whisking until everything is smooth and no dry cornstarch remains. This mixture will help create a thick, creamy coconut custard.
- Slowly pour about half of the hot milk mixture into the egg yolk mixture while whisking continuously. Take your time with this step. Adding the hot milk gradually raises the temperature of the eggs without scrambling them. Once combined, slowly pour the tempered egg mixture back into the saucepan with the remaining milk. Keep whisking as you pour.
- Reduce the heat to low and cook the mixture for about 5–6 minutes, whisking continuously. As the custard cooks, it will gradually become thicker, smoother, and glossy. Once it reaches a pudding-like consistency, remove the saucepan from the heat. Whisk in the unsalted butter, vanilla extract, and optional coconut extract until fully melted and combined. For an extra-smooth filling, pour the custard through a fine-mesh sieve to remove any small lumps.
- Allow the custard to cool for about 30 minutes, until it is warm but no longer piping hot. Stir in the sweetened shredded coconut until evenly distributed. Pour the filling into your prepared and cooled 9-inch pie crust, spreading it evenly with a spatula. Press a piece of plastic wrap directly against the surface of the custard. This prevents a skin from forming while the pie chills. Place the pie in the refrigerator overnight, or for at least 8 hours, until the filling is completely set.
- Just before serving, pour the cold heavy whipping cream into a chilled mixing bowl. Add the powdered sugar. Using an electric mixer, beat on medium-high speed until stiff peaks form. The whipped cream should hold its shape when you lift the beaters. Be careful not to overbeat, as the cream can become grainy and start turning into butter.
- Spread the whipped cream evenly over the chilled coconut filling, or transfer it to a piping bag and pipe decorative swirls around the top. Sprinkle the lightly toasted shredded coconut over the whipped cream for a little crunch and extra coconut flavor. Slice with a sharp knife, wiping the blade between cuts for cleaner slices. Serve chilled and enjoy!
Video
Notes
Common FAQs About Barefoot Contessa Coconut Cream Pie
When you give this Barefoot Contessa Coconut Cream Pie Recipe a try, you might have a few questions. Don’t worry-we’ve rounded up answers to the most common ones to help you out.
1. Can I make Barefoot Contessa Coconut Cream Pie ahead of time?
Yes! This pie is perfect for making ahead. Prepare the coconut filling, pour it into the crust, and refrigerate overnight. Add the freshly whipped cream and toasted coconut just before serving.
2. Why is my coconut cream pie filling runny?
A runny filling usually means the custard wasn’t cooked long enough or the pie didn’t chill for enough time. Make sure the custard becomes thick and glossy on the stovetop, then refrigerate the pie for at least 8 hours.
3. Can I use coconut cream instead of coconut milk?
You can, but coconut cream is much thicker and richer than coconut milk. It may change the consistency of the filling. Full-fat canned coconut milk is the better choice for this recipe.
4. Do I need to toast the shredded coconut?
Toasting isn’t necessary, but it adds a lovely nutty aroma, golden color, and crunchy texture. You can use plain shredded coconut if you prefer.
5. Can I use a store-bought pie crust?
Absolutely! A store-bought baked pie crust saves time and works well. You can also use a prepared graham cracker crust for a sweeter, slightly crunchy base.
6. How do I prevent lumps in coconut cream pie filling?
Whisk the egg yolk mixture until smooth before adding the hot milk. Temper the eggs slowly, then whisk continuously while cooking the custard. Straining the finished filling through a fine-mesh sieve can also help remove small lumps.
7. Can I make coconut cream pie without coconut extract?
Yes! Coconut extract is optional. The coconut milk and shredded coconut already provide plenty of coconut flavor. Vanilla extract adds a lovely sweetness on its own.
8. How long does homemade coconut cream pie last?
Homemade coconut cream pie generally keeps well in the refrigerator for up to 3 days when properly covered. Keep it chilled until you’re ready to serve.
9. How do I get clean slices of coconut cream pie?
Make sure the pie is fully chilled and set before slicing. Use a sharp knife dipped in warm water, then wipe it clean between cuts. This helps create neat slices without disturbing the creamy filling.
10. Can I use unsweetened shredded coconut?
Yes! Unsweetened shredded coconut is a good option if you prefer a less sweet dessert. Keep in mind that the coconut flavor and sweetness may be slightly different from the original version.
Barefoot Contessa Coconut Cream Pie is a wonderful homemade dessert when you’re craving something creamy, sweet, and full of coconut flavor. With its buttery crust, smooth coconut custard, fluffy whipped cream, and golden toasted coconut topping, every slice feels like a special treat.
I especially love that most of the preparation can be done ahead of time, making it easier to serve at family gatherings, holiday dinners, or weekend celebrations. Just give the filling enough time to chill, add the whipped cream before serving, and enjoy every delicious bite.
Give this coconut cream pie recipe a try, and don’t forget to share how it turned out. Your family might just ask you to make it again!
Drop a comment on the blog with your feedback-I can’t wait to hear what you think. Also, follow along on Pinterest, Facebook and YouTube for more tasty updates. Your support and thoughts mean the world!
Honest, satisfying dessert that tastes like it came straight from a professional bakery.