
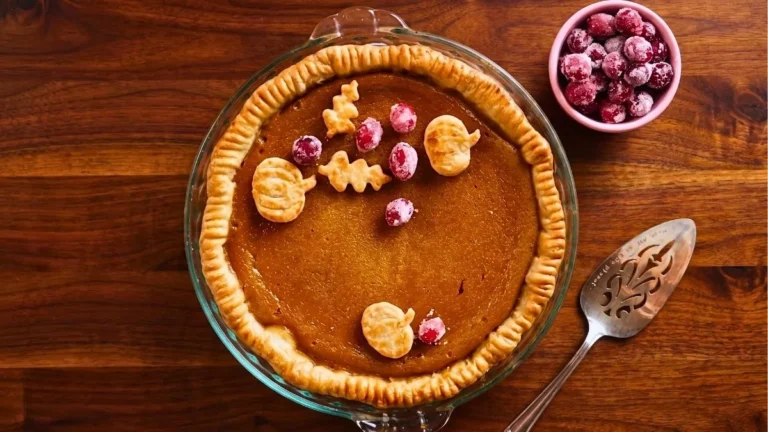

There’s something wonderfully comforting about a homemade pumpkin pie. The buttery crust, creamy pumpkin filling, and warm blend of fall spices make every slice feel like a little taste of the holidays.
This Sally’s Baking Addiction pumpkin pie recipe is the kind of dessert that looks beautiful on a festive table but is still simple enough to make at home. The filling is rich and silky without being overly heavy, while the homemade pie crust gives every bite that classic bakery-style finish.
Add a spoonful of homemade whipped cream on top, and you have a dessert that is hard to resist. Whether you’re preparing it for Thanksgiving, a family dinner, or simply craving a cozy fall dessert, this pumpkin pie is a wonderful choice.
What Is the Very Best Pumpkin Pie Recipe?
The very best pumpkin pie recipe comes down to a few important details: a flavorful crust, a smooth pumpkin filling, balanced spices, and careful baking. The filling should be creamy and set without becoming dry or cracked, while the crust should be golden and crisp around the edges.

This Sally’s Baking Addiction pumpkin pie recipe combines pumpkin with eggs, heavy cream, milk, cornstarch, and warm spices to create a rich, smooth filling. Using a homemade crust makes it even more special, and a pie crust shield helps keep the edges from getting too dark while the center finishes baking.
What Is the Secret to Baking Perfect Pumpkin Pie?
The secret to baking a perfect pumpkin pie is getting the texture and baking time just right. A great pumpkin pie should have a smooth, creamy filling that holds its shape when sliced while still feeling soft and rich in every bite.
Start with pure pumpkin puree and keep the spices balanced so the natural pumpkin flavor can shine. Make sure your eggs, cream, and milk are thoroughly combined with the pumpkin for a silky filling without lumps. A homemade, chilled pie crust also makes a big difference, giving you a crisp, buttery base.
Most importantly, don’t overbake the pie. The edges should look set while the center still has a gentle wobble when you take it from the oven. The filling will continue to firm up as it cools. Letting the pie cool completely before slicing is another simple step that helps you get those neat, beautiful slices.
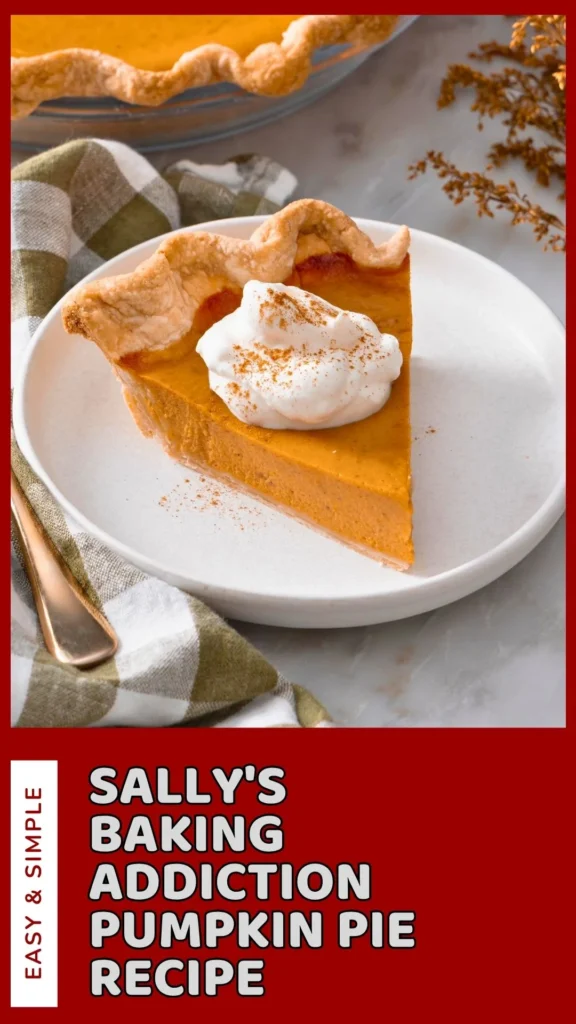
For the best finishing touch, serve each slice with a little homemade whipped cream. It adds a light, creamy contrast to the rich pumpkin filling and makes this classic dessert feel extra special.
Ingredients for Sally’s Baking Addiction Pumpkin Pie
Gather all the following ingredients, before you start making this Sally’s Baking Addiction Pumpkin Pie
For the Pie Crust
- 1 unbaked homemade pie crust – A buttery homemade crust gives the pumpkin pie a flaky texture and rich flavor. Prepare your favorite homemade pie crust and chill it before filling.
For the Pumpkin Filling
- 1 can (15 ounces / 425 g) pumpkin puree – Use pure pumpkin puree, not pre-sweetened pumpkin pie filling.
- 2 large eggs – Eggs help the filling set while giving it a smooth, custard-like texture.
- 1 cup (240 ml) heavy cream – Adds richness and creates a wonderfully creamy filling.
- ¼ cup (60 ml) milk – Lightens the filling slightly while keeping it smooth.
- 2 tablespoons cornstarch – Helps the pumpkin custard thicken and hold together when sliced.
- ¾ cup (150 g) packed light brown sugar – Adds sweetness and a subtle caramel-like flavor.
- 1 teaspoon ground cinnamon – Gives the pie its classic warm flavor.
- ½ teaspoon ground ginger – Adds a gentle spicy warmth.
- ¼ teaspoon ground nutmeg – Brings a soft, nutty spice note.
- ⅛ teaspoon ground cloves – Adds a deeper, fragrant spice flavor.
- ½ teaspoon salt – Balances the sweetness and brings out the pumpkin and spices.
- 1 teaspoon pure vanilla extract – Adds a smooth, rounded flavor to the filling.
Optional Toppings
- Homemade whipped cream – Perfect for adding a light, creamy finish.
- Pie crust cutouts – Use leftover pastry to create leaves, stars, or other festive shapes.
- Sugared cranberries – A beautiful option when you want the finished pie to look extra festive.
Kitchen Utensils and Equipment
- 9-inch pie dish
- Mixing bowl
- Whisk
- Measuring cups and spoons
- Rolling pin, if making the crust from scratch
- Pastry cutter or knife
- Pie crust shield or aluminum foil
- Cooling rack
- Baking sheet, optional
Prep, Cook & Total Time
Prep Time: 25 minutes
Cook Time: 55–65 minutes
Cooling Time: 2–3 hours
Total Time: About 3 hours 30 minutes
Servings: 8 slices
Step-by-Step Sally’s Baking Addiction Pumpkin Pie Instructions
Just follow this simple step by step guideline to make your homemade version of Sally’s Baking Addiction Pumpkin Pie in a delicious way.
1. Prepare the Pie Crust
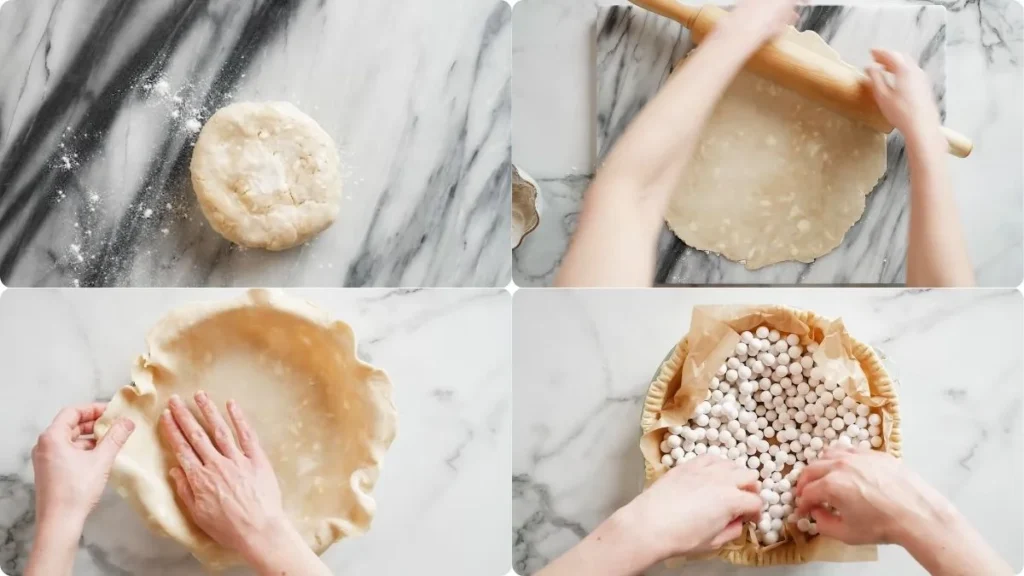
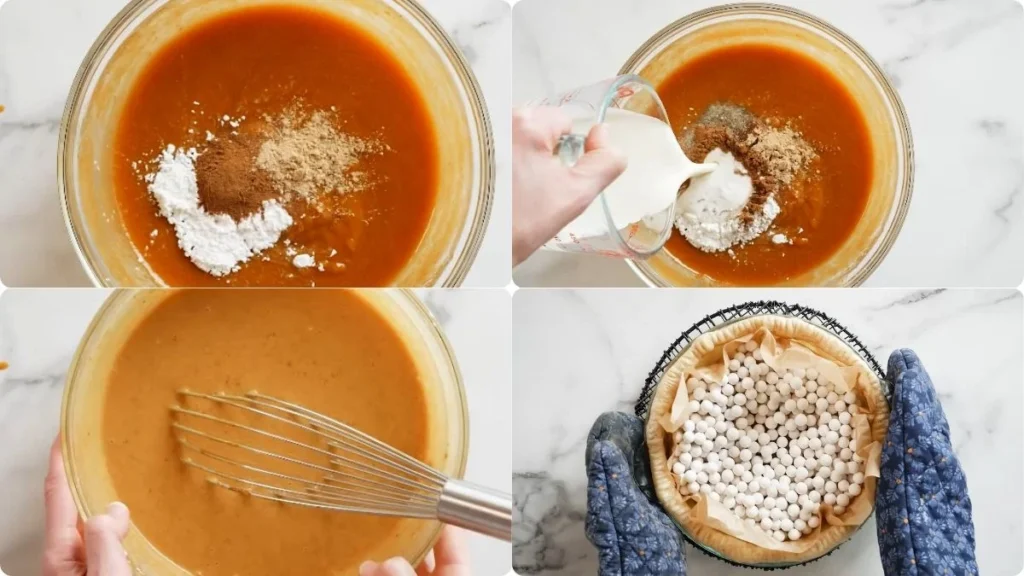
Prepare your homemade pie crust according to your recipe. Roll it out and carefully place it into a 9-inch pie dish.
Gently press the dough into the bottom and sides of the dish without stretching it. Trim any excess dough, then crimp or shape the edges however you like.
Place the prepared crust in the refrigerator while you make the filling. Keeping the pastry cold helps it hold its shape during baking.
2. Make the Pumpkin Filling
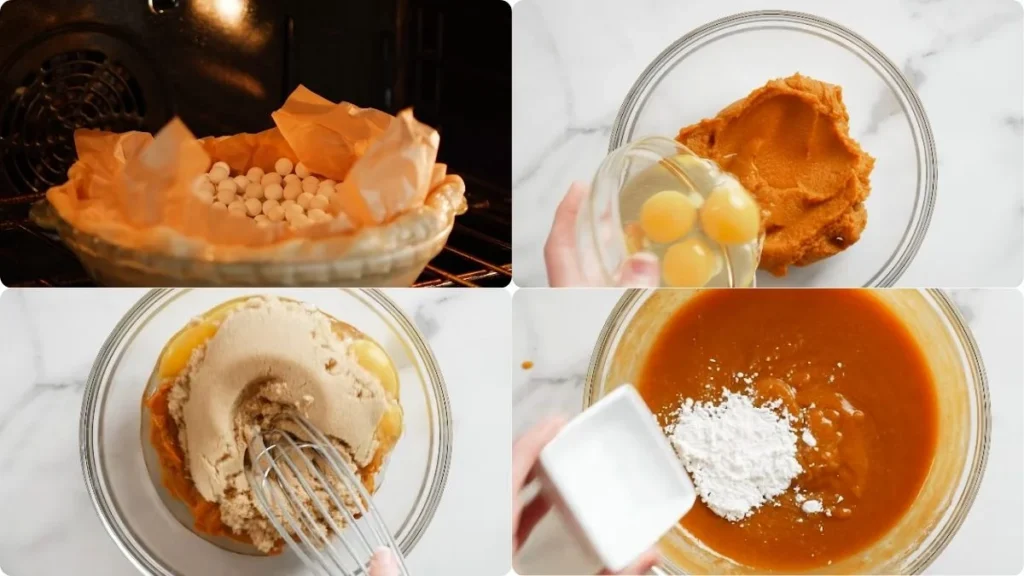
Add the pumpkin puree, brown sugar, eggs, heavy cream, milk, cornstarch, cinnamon, ginger, nutmeg, cloves, salt, and vanilla to a large mixing bowl.
Whisk everything together until the mixture is completely smooth and well combined. Take a moment to scrape the sides and bottom of the bowl so there are no pockets of cornstarch or spices left behind.
The finished filling should look creamy, thick, and evenly blended.
3. Fill the Pie Crust
Take the prepared crust from the refrigerator and place it on a baking sheet if desired.
Pour the pumpkin filling into the unbaked crust. Fill it evenly, but avoid overfilling the pastry.
Gently smooth the surface with a spoon or spatula.
4. Bake the Pumpkin Pie
Preheat your oven to 375°F (190°C).
Bake the pie until the filling is mostly set and the edges look firm. The center should still have a slight wobble when you gently move the pie-this is normal and helps prevent an overbaked, dry filling.
Depending on your oven and pie dish, baking generally takes around 55–65 minutes.
5. Protect the Crust Edges
About halfway through baking, check the crust.
Once the edges have developed a light golden-brown color, place a pie crust shield around the edge of the pie. You can also carefully cover the outer crust with strips of aluminum foil.
This protects the pastry from becoming too dark while allowing the pumpkin filling in the center to continue baking.
6. Cool the Pumpkin Pie
Remove the finished pie from the oven and place it on a cooling rack.
Let it cool completely before slicing. The filling continues to firm up as the pie cools, so cutting into it while it is still hot can result in messy slices.
For the cleanest slices, allow the pie to cool for at least 2 hours.
7. Add the Finishing Touches
Just before serving, add a generous spoonful of homemade whipped cream to each slice.
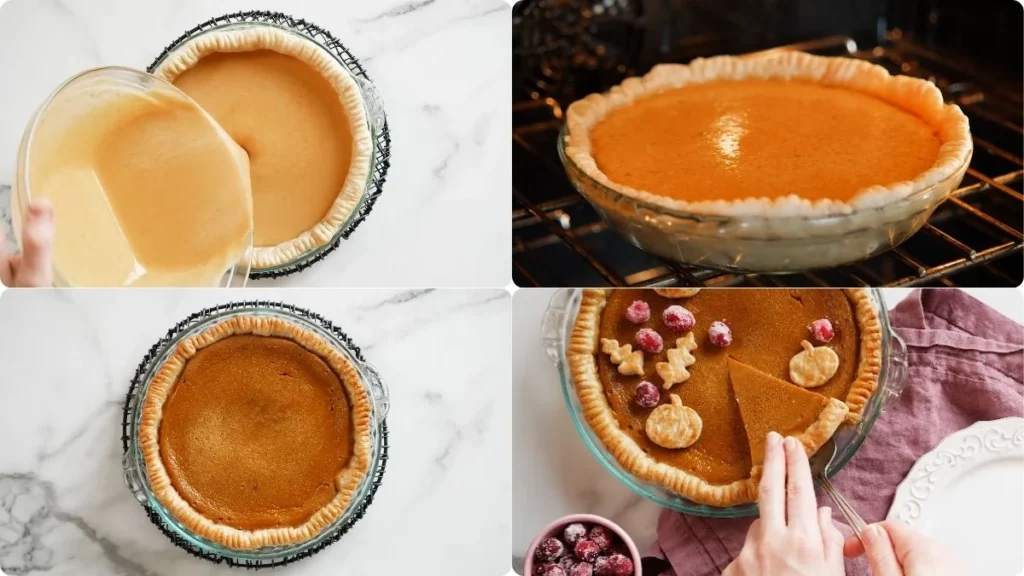
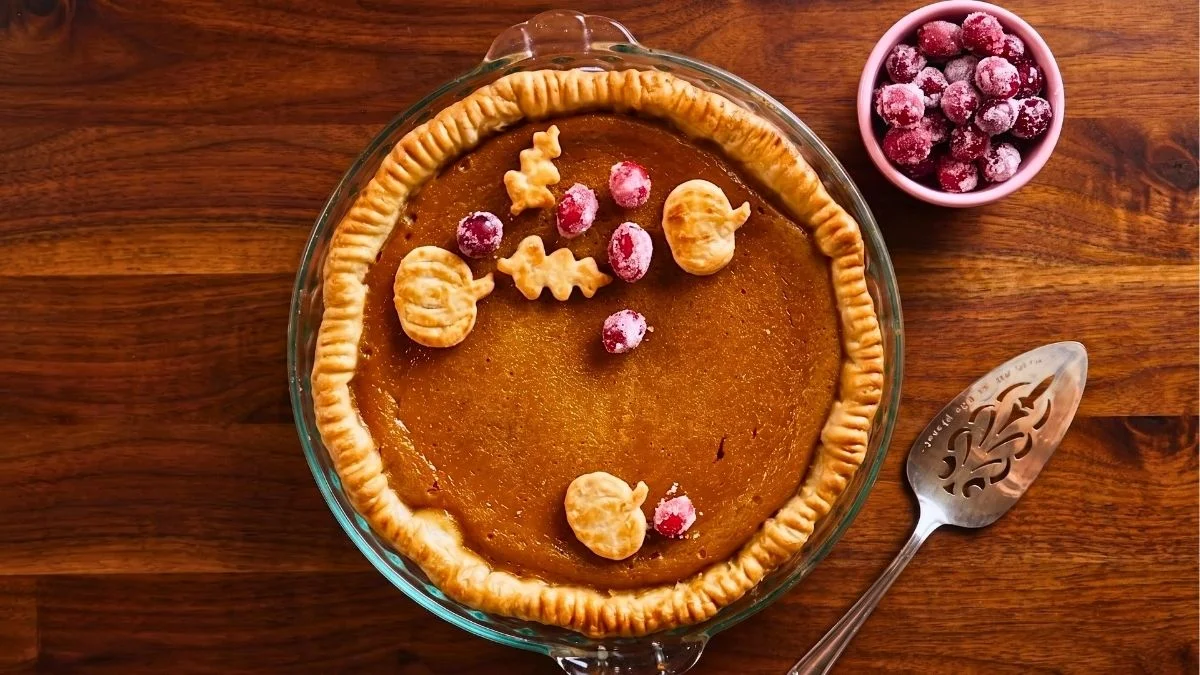
For a festive holiday presentation, decorate the pie with baked pie crust cutouts or a few sugared cranberries.
Is It Better to Use Heavy Cream or Evaporated Milk in Pumpkin Pie?
Both heavy cream and evaporated milk work beautifully in pumpkin pie, but they give the filling a slightly different texture and richness. Heavy cream is the better choice when you want an extra-rich, silky, and luxurious pumpkin pie. It adds more fat, which makes the custard feel smooth and indulgent without overpowering the pumpkin and warm spices.
Evaporated milk, on the other hand, creates a lighter but still creamy filling with a classic pumpkin pie texture. It is also a convenient option because it is shelf-stable and commonly used in traditional pumpkin pie recipes.
For a rich, velvety pumpkin pie, I prefer heavy cream. For a more traditional, slightly lighter filling, evaporated milk is an excellent choice. Either can make a delicious pie-the best option really comes down to the texture and richness you prefer.
What Are Common Mistakes When Making Pumpkin Pie?
Making pumpkin pie is fairly simple, but a few small mistakes can affect the texture, crust, and overall flavor. One of the most common mistakes is overbaking the filling. Pumpkin pie should have a slight jiggle in the center when it comes out of the oven because it will continue to set as it cools. Baking it until the center is completely firm can leave you with a dry, cracked filling.
Another mistake is cutting the pie too soon. Give it plenty of time to cool so the custard can finish setting and the slices hold their shape. It’s also important to protect the crust edges with a pie shield or foil once they become golden, otherwise they can brown too quickly.
Using pumpkin pie filling instead of plain pumpkin puree is another easy mix-up, since the two are not interchangeable. Finally, avoid adding too much spice or sugar. A balanced blend of cinnamon, ginger, nutmeg, and cloves should complement the pumpkin rather than overpower it.
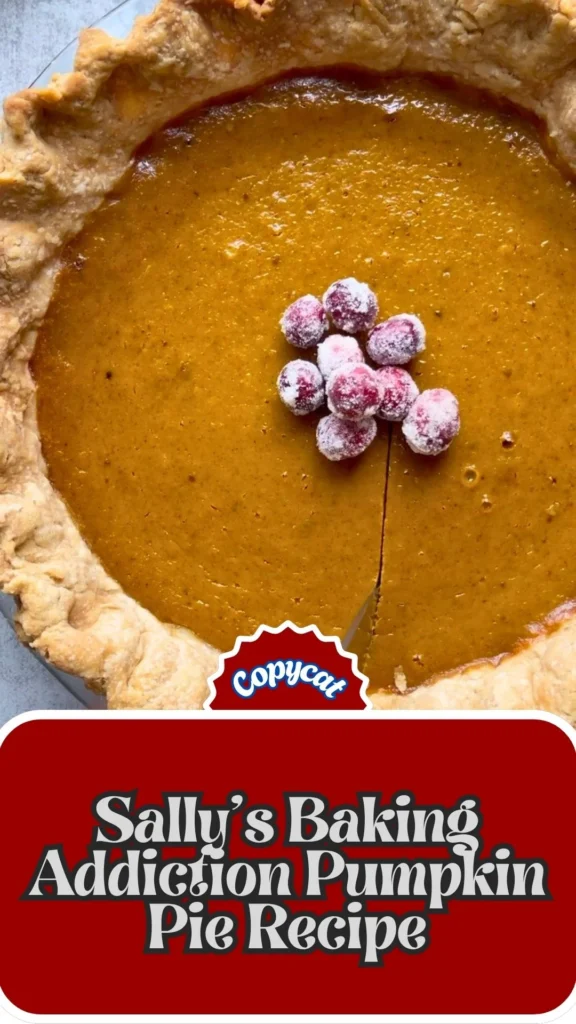
With these simple tips in mind, you can make a pumpkin pie that is creamy, flavorful, beautifully set, and golden around the edges.
Tips, Tricks, and Substitutions for This Pumpkin Pie
- Use pure pumpkin puree: Pumpkin pie filling already contains sugar and spices, so it can make the finished pie overly sweet or heavily spiced.
- Keep the crust cold: Chilled pastry is easier to work with and is more likely to hold its shape while baking.
- Don’t overbake the filling: The center should have a gentle jiggle when the pie comes out of the oven. It will continue setting as it cools.
- Protect the crust: A pie shield is especially helpful because pumpkin pie takes longer to bake than it takes for the pastry edges to brown.
- Use homemade whipped cream: Its light texture pairs beautifully with the rich pumpkin filling.
- Make it dairy-friendly: A suitable dairy-free heavy cream alternative and plant-based milk can be used, although the texture may vary slightly.
- Adjust the spices: For a stronger spice flavor, slightly increase the cinnamon or ginger. For a gentler flavor, reduce the cloves.
Serving Suggestions for Sally’s Baking Addiction Pumpkin Pie
Serve this pumpkin pie at room temperature or slightly chilled, depending on your preference. A generous dollop of homemade whipped cream is the classic finishing touch.
For a holiday dessert table, pair slices with coffee, tea, or warm apple cider. You can also add a light dusting of cinnamon on the whipped cream for an extra cozy touch.
Pie crust leaves, stars, or sugared cranberries make particularly pretty decorations for Thanksgiving and other festive gatherings.
Storage and Reheating Instructions
Let the pumpkin pie cool completely, then cover it and keep it in the refrigerator for up to 4 days.
To serve it cold, simply take a slice from the refrigerator and add whipped cream.
You can also let a slice sit at room temperature for a short time before serving. Pumpkin pie usually does not need reheating, but if you prefer it warm, gently heat individual slices in the microwave for a few seconds. Avoid overheating, as it can make the filling watery or rubbery.
Sally’s Baking Addiction Pumpkin Pie Recipe
Ingredients
Method
- Prepare your homemade pie crust according to your recipe. Roll it out and carefully place it into a 9-inch pie dish. Gently press the dough into the bottom and sides of the dish without stretching it. Trim any excess dough, then crimp or shape the edges however you like. Place the prepared crust in the refrigerator while you make the filling. Keeping the pastry cold helps it hold its shape during baking.
- Add the pumpkin puree, brown sugar, eggs, heavy cream, milk, cornstarch, cinnamon, ginger, nutmeg, cloves, salt, and vanilla to a large mixing bowl. Whisk everything together until the mixture is completely smooth and well combined. Take a moment to scrape the sides and bottom of the bowl so there are no pockets of cornstarch or spices left behind.
- Take the prepared crust from the refrigerator and place it on a baking sheet if desired. Pour the pumpkin filling into the unbaked crust. Fill it evenly, but avoid overfilling the pastry. Gently smooth the surface with a spoon or spatula.
- Preheat your oven to 375°F (190°C). Bake the pie until the filling is mostly set and the edges look firm. The center should still have a slight wobble when you gently move the pie-this is normal and helps prevent an overbaked, dry filling. Depending on your oven and pie dish, baking generally takes around 55–65 minutes.
- About halfway through baking, check the crust. Once the edges have developed a light golden-brown color, place a pie crust shield around the edge of the pie. You can also carefully cover the outer crust with strips of aluminum foil. This protects the pastry from becoming too dark while allowing the pumpkin filling in the center to continue baking.
- Remove the finished pie from the oven and place it on a cooling rack. Let it cool completely before slicing. The filling continues to firm up as the pie cools, so cutting into it while it is still hot can result in messy slices. For the cleanest slices, allow the pie to cool for at least 2 hours.
- Just before serving, add a generous spoonful of homemade whipped cream to each slice. For a festive holiday presentation, decorate the pie with baked pie crust cutouts or a few sugared cranberries.
Video
Notes
Common FAQs About Sally’s Baking Addiction Pumpkin Pie
When you give this Sally’s Baking Addiction Pumpkin Pie Recipe a try, you might have a few questions. Don’t worry-we’ve rounded up answers to the most common ones to help you out.
Can I make Sally’s Baking Addiction pumpkin pie ahead of time?
Yes. Pumpkin pie is an excellent make-ahead dessert. You can bake it a day before serving and keep it covered in the refrigerator until you are ready to serve it.
Why is my pumpkin pie still jiggly after baking?
A small amount of movement in the center is normal when the pie first comes out of the oven. The filling continues to cook and firm up as it cools. However, if the entire filling looks liquid, it needs more baking time.
How do I stop my pumpkin pie crust from burning?
Use a pie crust shield or loosely cover the outer edges with aluminum foil about halfway through baking. This allows the center to continue cooking without over-browning the crust.
Should pumpkin pie be refrigerated?
Yes. Because pumpkin pie contains eggs and dairy, it should be covered and stored in the refrigerator after cooling.
Can I use store-bought pie crust?
Absolutely. A homemade crust gives the pie a special buttery flavor, but a good-quality refrigerated or frozen pie crust can be used when you want to save time.
Can I freeze pumpkin pie?
Yes, pumpkin pie can be frozen. Let it cool completely, wrap it well, and freeze it for up to about 1 month for the best quality. Thaw it in the refrigerator before serving.
Why did my pumpkin pie crack?
Cracks often happen when the filling is overbaked. Take the pie out when the edges are set but the center still has a slight jiggle. Cooling the pie gradually can also help.
This Sally’s Baking Addiction pumpkin pie recipe is a wonderfully comforting dessert with a flaky homemade crust and smooth, warmly spiced pumpkin filling. The combination of pumpkin, eggs, cream, milk, cornstarch, and aromatic spices creates a rich custard that slices beautifully once cooled.
Take your time with the crust, avoid overbaking the filling, and give the finished pie plenty of time to cool before slicing. Finish it with homemade whipped cream, festive pastry cutouts, or sugared cranberries, and you’ll have a beautiful dessert ready for any fall or holiday gathering.
A homemade pumpkin pie like this is the kind of dessert that makes everyone want just one more slice.
Drop a comment on the blog with your feedback-I can’t wait to hear what you think. Also, follow along on Pinterest, Facebook and YouTube for more tasty updates. Your support and thoughts mean the world!
This might sound dramatic, but this is the best pumpkin pie I’ve ever had, like ever!